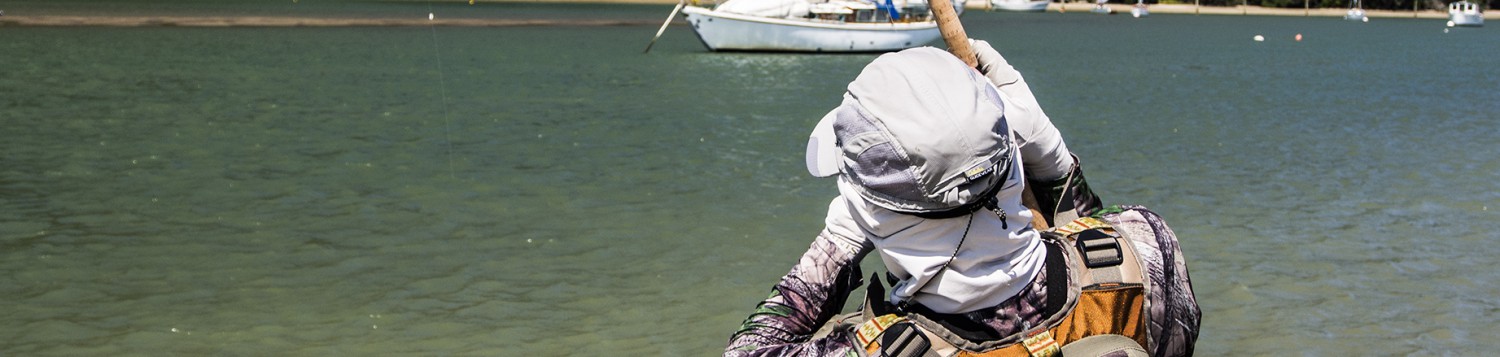

Lead image: Rob Wilson (https://www.ghostfishing.co.nz/)

One of the biggest issues facing anglers spin fishing from the shore is snagging and losing lures. If you are fishing an area for the first time or using lures not suited to the terrain that you are fishing then losses can be significant and expensive. There is a fine balance between getting your lure close to the bottom where the fish are generally holding and leaving it there permanently for the fish to admire at their leisure.
It takes practice and skill to avoid lure losses but there are a lot of simple things you can do to dramatically reduce the number of lure losses per session.
Aside from increasing the breaking strain of the line being used, arguably the most important thing to learn in order to reduce lure losses is how to cast accurately. Just as with fly fishing, it is worth spending time practicing casting in a park between fishing sessions so that you have a better feel for how much power is required to send different lures a certain distance and how to counter the effects of wind. This casting memory ensures you don’t over cast when reaching a new fishing spot. The old saying “practice makes perfect” definitely applies to casting with a spinning rod, especially when it comes to accuracy.
My personal preference is to use a side cast as this lowers the lure trajectory and minimises the effect of wind on cast accuracy. However, it does not really matter whether a side or overhead cast is used as long as you can repeatedly cast the lure exactly where you want it to go.
The video below shows how accurate side casting can be as I’m casting amongst channel marker poles as well as at a moored boat. When casting at moored boats it is important to land the lure as close as possible to the hull. This can be tricky on a windy day as overshoot and you likely lose the lure. If the wind is blowing hard (as it was on the day the video was filmed) then it can be doubly difficult. Should you want to learn more about the merits and disadvantages of side and overhead casts then click on:- WHAT IS THE BEST WAY TO CAST LURES?
The next thing to do is to look at the area you are intending to fish online using Google Earth (or Flash Earth – https://zoom.earth/). This will show you where the channels are and identify the extent of weed beds and other major structure, such as large masses of rock. These are marked in red on the satellite image below and show the areas where fish will hold. It is important to get an idea of the where the structure is so that you can plan how to get close to it with a lure without getting snagged. Try and develop a mental picture of what the area looks like and then spend time when you actually get to the spot figuring out where the hazards are and how to mitigate the risks.

It is also worth looking at marine charts to see how deep the water actually is and select lures accordingly. As you can see from the chart ship below there is a deep hole of Shag Point (11.5 metres) with a steeply sloping shelf into it (from 0.6 metres to 11.5 metres). This is going to be challenging to fish as you’ll need a heavy or deep diving lure to reach the bottom of the channel hole but keeping it away from any rocks or weed in the shallows during the retrieve will be difficult. I’d probably tackle this scenario with either bibless or metal lures as it is easier to control the tracking depth with these lures types, especially when the bottom shelves this dramatically.

If you do not have access to marine charts or the internet then it is possible to get a feel for the depth of a channel just by looking at the slope of the beach or bank leading into the channel. Generally, the slope of the channel bottom mirrors that of the beach or bank. For example, if the beach has a steep slope then so will the bottom. Conversely a beach with a gradual slope indicates a shallow channel with a bottom that also slopes gradually. The diagram below shows this.

The next thing to do to reduce lure loss is to fish with braid. Braid is stronger and thinner in diameter than monofilament. Importantly it also has minimal stretch which results in increased sensitivity. With braid the angler can feel what is happening to the lure, especially when it is nudging the bottom during the retrieve or is negotiating its way through a weed bed. Another bonus of using a low stretch line with a higher strength to diameter ratio is that it is easier pull a lure clear of a snag when it does occasionally get stuck.
Switching to braid and increasing the breaking strain of the monofilament shock leader will increase the likelihood of recovering snagged lures. It should also reduce the number of times the lure snags as with braid the angler feels the lure touching the bottom, due to the increased sensitivity, and can then adjust the retrieve speed to lift the lure of the bottom slightly. As a rough rule of thumb, the faster the retrieve the higher the lure tracks off the bottom.

Colour graduated braid, where the colour changes every 10 metres, can be another key factor in reducing lure losses. There are several reasons for this:-
- It allows the angler to judge casting distance more accurately and make subtle adjustments to get closer to the target. If you are casting too short or too long it is not as difficult to work out how much to increase or decrease casting effort to optimise distance and accuracy. The graduations effectively act as a range finder. It is also possible to stop casts short by lightly fingering or clamping on the spool if you know which colour equates to the correct casting distance.
- With coloured braid it is easy to see how far the lure is from the shore. If, for example, you know that the bottom lifts steeply 15 metres from the shore and that the colour blue is 20 metres from the rod tip then it is a simple matter to lift the rod tip and speed the retrieve up when you see blue braid at the tip in order to get the lure up off the bottom and out of danger. This increase in speed close to shore can often be the trigger for any predator shadowing the lure to strike.
- Should you get temporarily snagged during a retrieve then it is easy to see from the colour graduations where it happened and then speed up subsequent retrieves when the problem colour starts to appear in order to prevent a recurrence.

If you are casting towards a tree or rock encrusted bank in a shallow channel then it is always a good idea to start by casting gently (short of the bank) and then use the braid colour graduations to build a “feel” for how much effort is needed to get close to the target. Once you’ve got an idea as to how much power is required it is much easier to deliver casts with metronomic accuracy. I’ve noticed that there is also a temptation to over power the first few casts made in a session and this inevitably leads to the lure ending up getting caught on something.
MINIMISING LOSSES WITH BIBBED (HARD BODIED) LURES
The biggest reason that anglers lose bibbed lures is that they do not know how deep the lure they are using will dive to during the retrieve. This is a relatively easy problem to solve.
There is an excellent book written by Frank Prokop called Lure Encyclopaedia (ISBN 1 86513 0672) which lists the maximum diving depth of hundreds of common lures when trolled. It looks at all types of bibbed lures, floating, suspending and deep diving.
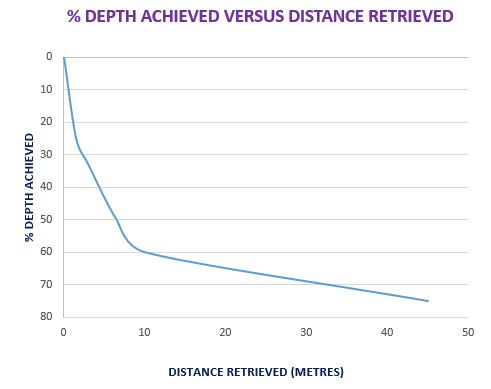
Prokop found that as a rough rule floating, diving bibbed lures typically only reach 50 – 90 percent of the trolled depth when cast and he suggests that a rough average of 75 percent is a good approximation in most cases. I’ve taken Prokop’s figures and graphed them to give an idea of how quickly a lure reaches the maximum depth. What is evident is that the lure gets to 50 – 60% of it’s maximum dive depth within the first 10 metres of the retrieve but then takes a long distance to reach the maximum depth. If the cast is short then the lure may never reach its maximum dive depth.
Obviously a typical retrieve is more U shaped than shown in the graph below as the angler will begin to lift the rod tip and bring the lure to the surface as it nears the shore but it does show how long it actually takes for a cast lure to reach its optimum dive depth and provide a valuable insight into how diving lures behave.
Why is this important? Simply because you need to match the lure dive depth to the water depth in the area that you intend to fish. This is especially critical for sinking bibbed lures as if the lure dives too deeply then there is more chance that it will continuously get snagged on the bottom, rather than the ideal situation which is to track close to the bottom and only touch the sand occasionally. It makes sense to use floating bibbed lures in shallow channels (less than 5 metres deep) as if they do catch on the bottom or an obstruction then it is possible to get them to float off the snag by simply allowing the line to go slack.
One of the things worth doing if you have a copy of Prokop’s book is to write the maximum diving depth on all of the lures in your tackle box so that it makes it easy to select a lure to suit the target area. For example, if you are going to fish the last two hours of the outgoing tide in a wide channel with a depth of 2 metres then it makes sense to use a lure with a maximum diving depth of 2 – 2.5 metres. If you select a lure with a diving depth of 5 metres then it will likely end up ploughing a furrow in the seabed and consequently be more likely to snag. Remember that if there is a strong current flowing it may be necessary to choose a deeper diving lure in order to reach the bottom.
For more information on how to use bibbed lures click on:- HOW TO FISH HARD BODIED LURES
MINIMISING LOSSES WITH SINKING LURES (BIBLESS AND METAL)
Lures that sink (bibless and metal types) are ideal for prospecting but are also the easiest to lose on the bottom or structure just because they inevitably sink to the bottom if retrieved too slowly. To avoid snagging:-
- Use fast retrieves for the first few casts so that the lure tracks closer to the surface. Once you become familiar with the area being fished, gradually slow successive retrieves down so that you let the lure get closer to the bottom.
- The alternative is to maintain a fixed retrieve speed but “count” the lure down before retrieving. What this means is that you let the lure sink for a fixed, short period before starting to retrieve. This can be a deadly technique with lures that flutter during their descent. My preference is to let the lure sink in five second increments. Wait 5 seconds before retrieving for the first cast, 10 seconds for the second cast, 15 seconds for the third cast and so on until you eventually feel the lure hit the bottom. When this happens retrieve quickly and for successive casts count down to one interval less.
- When using the “counting down” technique it is often best to set the retrieve speed to that which makes the rod tip nod most vigorously as this is when the lure action is optimised.
- Remember to take into account tidal movement especially if you are fishing during the ebb tide when the channels are getting progressively shallower. Speed up the lure and shorten count down times as the tide goes out and vice versa if the tide is coming in. This is particularly important mid-way between high and low tide as 50% of the water actually moves in or out between the third and fourth hours of the incoming or outgoing tide.
- Start retrieving the lure with the rod tip close to the water and, as in the images below, lift the rod tip progressively as the lure gets closer to the shore. This will lift the lure up from the bottom and avoid snagging. Using colour graduated braid helps this process immensely as it is easy to determine how close the lure is to the shore.
- Use lures with single hooks rather than treble hooks.


For more detailed information on using these lure types click on the following links:-
- Bibless lures – USING BIBLESS LURES
- Metal lures:- METAL LURES
MINIMISING LOSSES WITH SOFT PLASTICS
The most important thing to get right when fishing soft plastics is the jig head weight. If the jig head is too heavy then the lure will sink straight to the bottom. Once a heavy jig head is sitting on the bottom it is difficult to lift it with the rod and this means it will track along the bottom when retrieved. Obviously the chances of snagging the lure when it is sitting “hard” on the bottom and being retrieved along it are much greater than when the lure is barely touching the bottom.
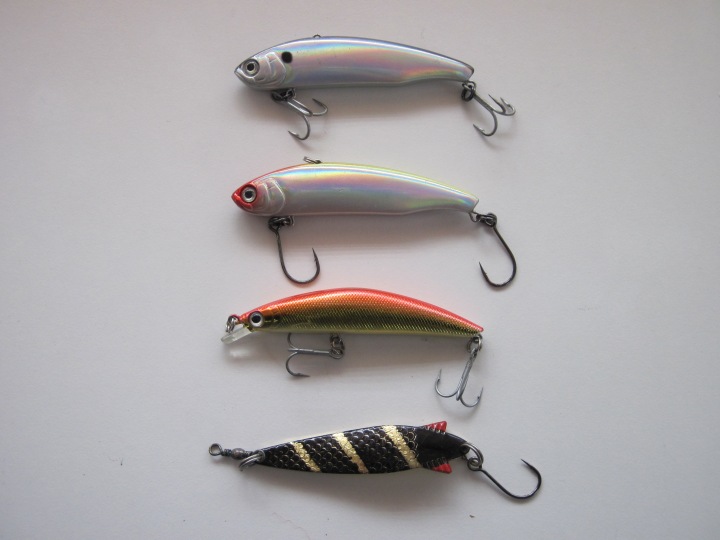
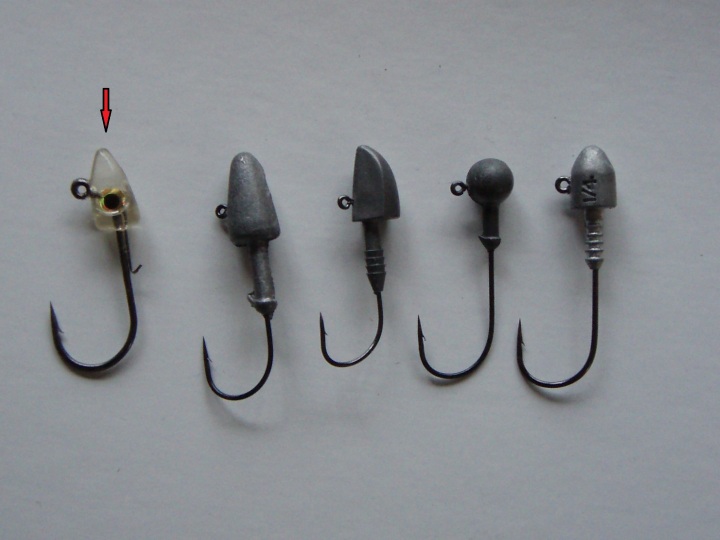
With soft plastics it is a important to get the lure close to the bottom, or the top of weed beds, and also maximise the time that the lure spends drifting through where the fish are holding. If the water is shallow it is a wise move to start with a light jig head (such as a resin head – arrowed in the image below) and see how deep it actually gets to on a drift. If it does not end up touching the bottom then slowly increase the jig head weight in 2 gram increments until it does. The ideal weight is when the jig head just enough to reach the bottom and only occasionally touches down lightly during the drift.
The shape of the jig head will also impact how quickly it sinks through the water column and this is covered off in detail in the following article:- CHOOSING THE RIGHT JIG HEAD
One of the things worth remembering is that the further the eye of the hook is from the front of the jig then the greater the chances are that you can tip or roll it over an obstacle if it gets snagged. Also when a jig head is snagged at the front the further the hook eye is from the point of snagging then the more lever force can be applied to free it by the angler.
One final thing that helps with minimise soft plastic losses is to use jig heads with lighter gauge wire hooks with a smaller gape. Heavy gauge hooks with wide gapes are more likely to snag and are difficult to shift when they do. Lighter gauge hooks have some inherent flex and this can help in retrieving them when snagged. It is a balancing act though as you do not want to be using hooks that are too fine for the target species. There is another more important reason to use the finest gauge wire hooks practicable and this is to do with hook point penetration. HOOK PENETRATION

Thank you for your kind reference to my Lures in Depth books.
Kind regards
Frank Prokop
Frank the books are brilliant. Thanks for all the time you spent designing the experiments, gathering the data and sharing it. So helpful.